
| Previous Page | Glass Blowing Menu | Main Menu | Next Page |
|---|
Hand annealed parts always have stress remaining and the more uneven the thickness, the more problematic it is. I had a number of failures due to cracks developing in the glass to metal seals of devices. Sometimes this would occur immediately on cooling and other times some time later. The only way to produce reliable results is to anneal using an oven.
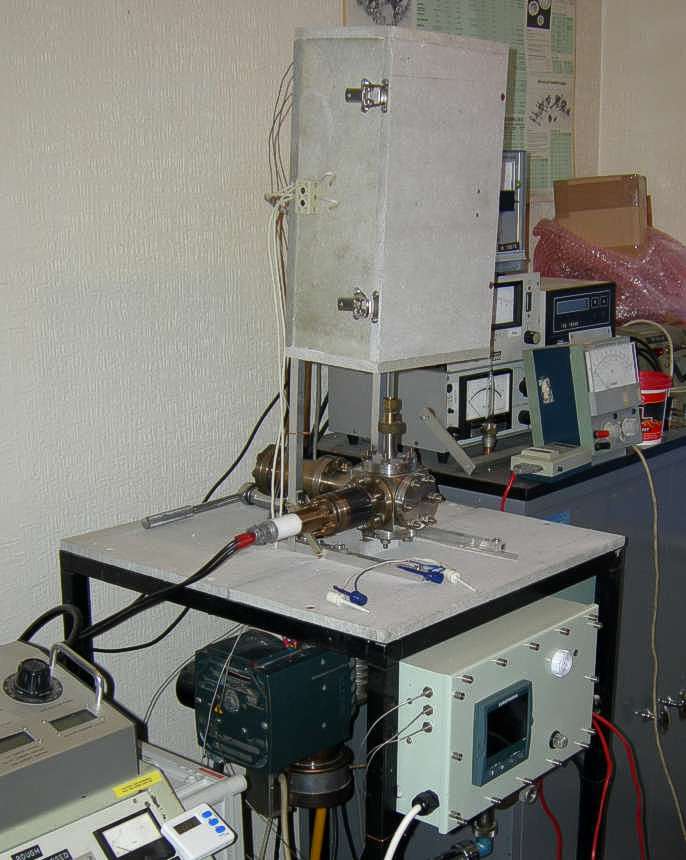
It is advantageous to heat a vacuum device to a high temperature while it is being evacuated. This is called baking. The increased temperature drives off moisture and adsorbed gases, leading to a harder vacuum. For this reason, I built the oven on top of the vacuum rig. This way it does not occupy any extra space and can double as a bakeout oven for higher vacuum devices in the future.
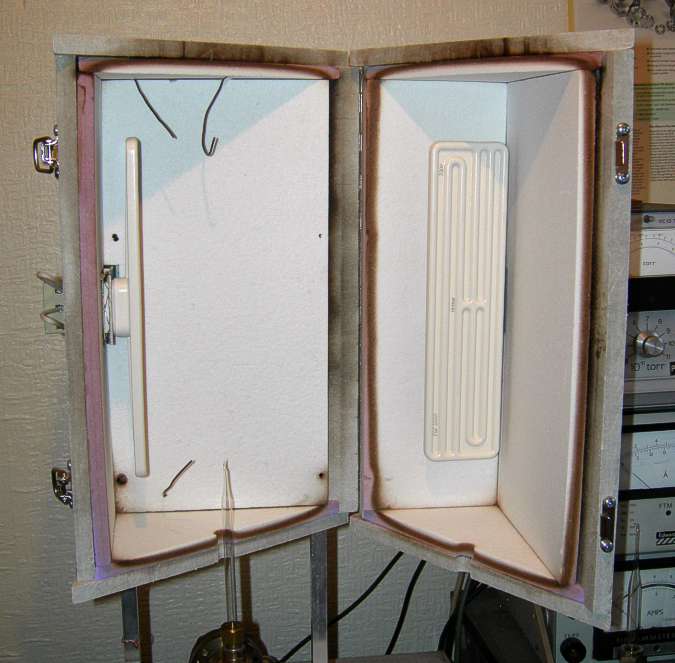
The housing of the oven was made from Syndanio board. Analysis of this board has revealed traces of asbestos. I therefore don't recommend using it. This is a pity because it is an excellent refractory structural material and can be cut, drilled and tapped. The oven is made like a clam shell, with a hinge on the right hand side. The Syndanio board on its own did not provide sufficient thermal insulation. To improve the insulation, I lined it with Thermal Ceramics SW BRD insulation board. The elements are Hi-Heat FSF 500W ceramic infrared heating elements. There are two elements for a total heating power of 1000W.
The three 'wires' sticking out of the fixed half of the oven are thermocouples. The top middle thermocouple is the controlling one and also doubles as a hook for hanging the item to be annealed from. The other two thermocouples are for monitoring purposes.
The first time the oven was heated up, the Thermal Ceramics board fumed very heavily, producing a nasty sweet smell. After the first test, the board had changed colour from the original purple to carbon black. The elements had developed blue lines all over them. It did not look encouraging. I decided to heat it up a second time and try annealing a test piece at 530°C. After this run, the insulation board had changed to white and the lines on the elements had disappeared. You can see the transition from purple to black to white in the top left of the photograph above.
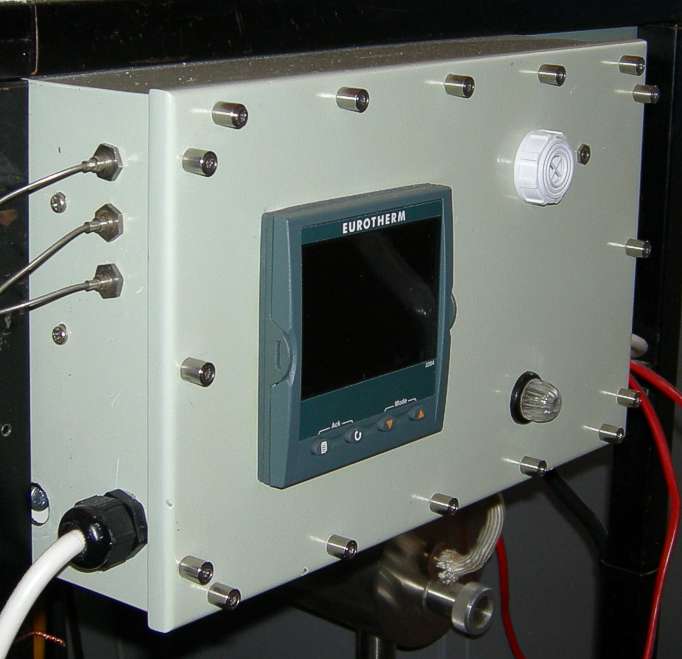
The controller is a Eurotherm 3204. It has some basic program features such as temperature rate control. This makes it ideal as an annealing oven controller. The controller has a parameter called SP.RAT that can be set to control the rate of change of temperature.
The three 'wires' coming out of the top left of the box are mineral insulated 'K' type thermocouples. The white circle, top right is an audible alarm, which operates on over-temperature and faults such as open-circuit thermocouple. The light, bottom right shows when the elements are energized.
| Item | Anneal | Cool Rate | Time | Cool Rate | Time |
|---|---|---|---|---|---|
| Thickness | @ 530°C | 530°C to 400°C | 530°C to 400°C | 400°C to 50°C | 400°C to 50°C |
| 3mm | 15 min | 215°C/h | 30 min | 545°C/h | 40 min |
| 5mm | 23 min | 138°C/h | 45 min | 357°C/h | 60 min |
| 6.5mm | 30 min | 99°C/h | 60 min | 260°C/h | 80 min |
| 9.5mm | 45 min | 60°C/h | 90 min | 168°C/h | 120 min |
Recommendations for annealing schedules vary widely. The scedule that I have been using is shown above. The thicker the item, the longer it has to be held at the annealing temperature and the slower it must be cooled. 530C is the recommended anneal point temperature for Schott AR-Glas®.
The procedure that I have been using for Dumet seals made in the end of 8mm light-wall tube is as follows:
| Previous Page | Glass Blowing Menu | Main Menu | Next Page |
|---|